Chrome Extension
Introduction
Welcome to the documentation for our Chrome Extension. This extension is designed to streamline your workflow by allowing you to create links without needing to open the main portal, log in, and navigate through various pages. With this extension, you can perform essential tasks directly from your browser, saving you time and effort.
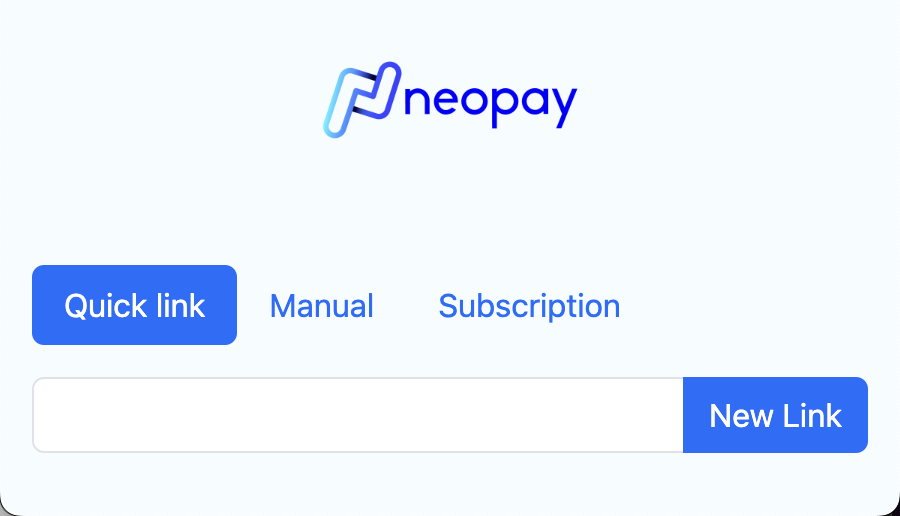
The Chrome Extension offers three main functionalities:
- Quick Links: This feature allows you to create links with just one click, making the process fast and efficient.
- Manual Links: This functionality mirrors the capabilities available in the main portal, giving you the flexibility to create links with custom settings and options.
- Subscription Links: This feature enables you to create recurring monthly links, perfect for subscription-based services.
By using our Chrome Extension, you can enhance your productivity and manage your links more effectively.
Authentication
To use the Chrome Extension, you need to authenticate yourself to ensure secure access to your account. Follow these steps to authenticate:
- Install the Extension: First, install the Chrome Extension from the Chrome Web Store. You can get it from the following link Neopay Quick Links.

- Open your neopay portal: Once installed, go to your neopay portal and make a login with your credentials.
- Get your token: After login, you will be redirected to the dashboard. Select the Applications menu and choose the application you want to use the extension. Then, copy the Chrome extension ID and Client Secret to the extension.

- Log In: Click on the extension icon in your browser toolbar. You will be prompted to log in using your API credentials obtained on the previous step.
{info.fa-hint} Chrome extensions cannot stay open while you change tabs to copy the credentials. We recommend you to copy the Client Secret to your clipboard before opening the extension. Then, paste the Client Secret in the extension. The Chrome extension ID should then be typed in the extension instead of copy/pasting.

-
Token Storage: Once authorized, the extension securely stores an authentication token in your browser. This token is used to authenticate your requests without requiring you to log in each time.
-
Ready to use!: You can now use the extension to create links.
If you ever need to log out or switch accounts, you can do so by clicking on the extension icon and selecting the "Log Out" option. This will remove the stored token and prompt you to log in again.
By following these steps, you can ensure that your use of the Chrome Extension is secure and that your account remains protected.
Quick Links
Using the Quick Links feature in our Chrome Extension is simple and efficient. Follow these steps to get started:
-
Connect to Neopay Portal:
- Open your Neopay portal and log in with your credentials. This is required to access the features of the Chrome Extension.
-
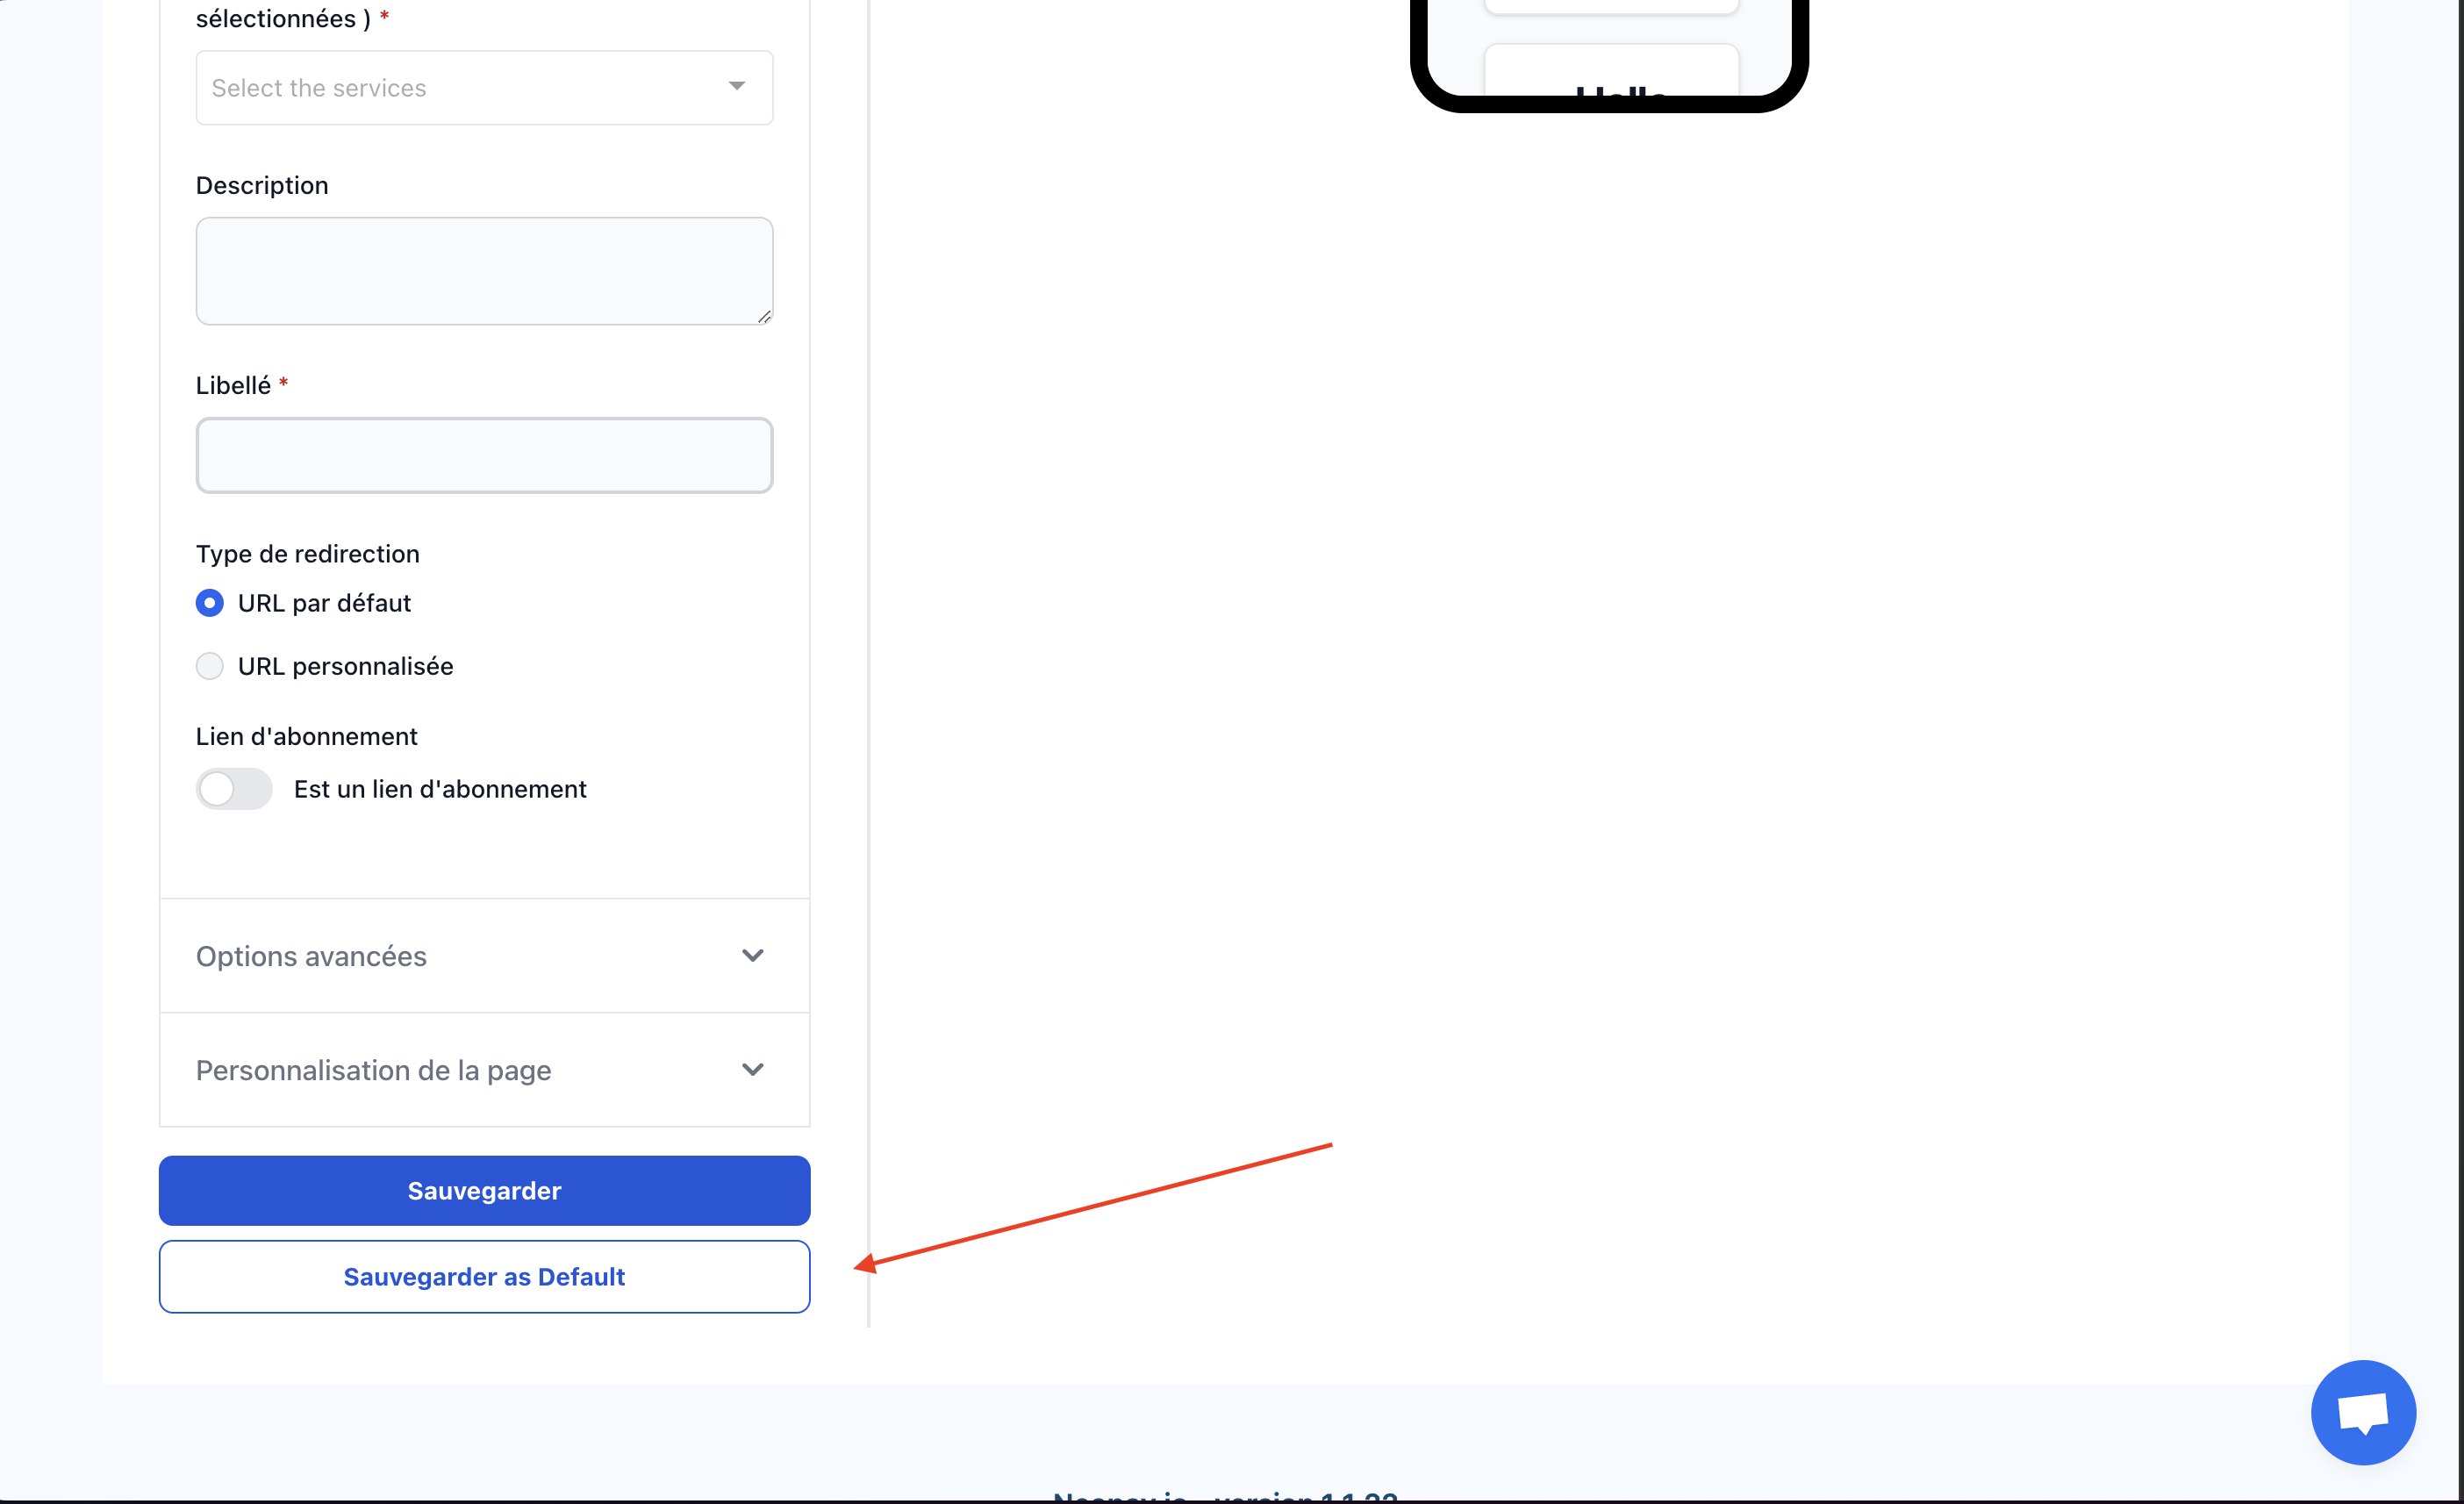
Create a Manual Link:
- Once logged in, navigate to the section where you can create links manually. Fill in the necessary details for the link you want to create.
-
Save as Default:
- After configuring your manual link, click on the "Save as Default" button. This action will save the current link configuration as the default setting for future links.
-
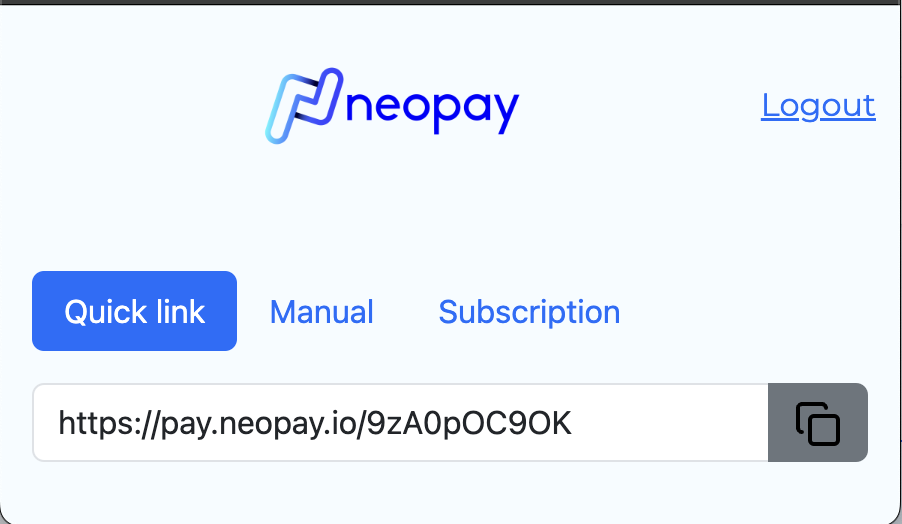
Create Quick Links:
- With the default configuration saved, you can now create new links with just one click using the Chrome Extension. Simply click on the extension icon in your browser toolbar and select the "Quick Links" option. The extension will use the saved default settings to generate a new link instantly.
By following these steps, you can streamline the process of creating links and save time by using the Quick Links feature in the Chrome Extension.
Manual Links
The Manual Links feature in our Chrome Extension mirrors the capabilities available in the Neopay portal, providing you with the flexibility to create links with custom settings and options. Follow these steps to create a manual link:
-
Open the Extension:
- Click on the extension icon in your browser toolbar to open the Chrome Extension interface.
-
Navigate to Manual Links:
- Select the "Manual Links" option from the extension menu to access the manual link creation form.
-
Fill in the Required Fields:
- Complete all the necessary fields in the form to create your link. These fields may include details such as the link name, description, amount, currency, and any other relevant information required for the link.
-
Save & Publish:
- Once you have filled in all the fields, click on the "Save & Publish" button. This action will create the link and immediately publish it.
-
Retrieve Your Link:
- After clicking "Save & Publish," the extension will display the newly created link on the screen, ready for you to use.
By following these steps, you can create customized links directly from the Chrome Extension, just as you would within the Neopay portal. This feature allows you to tailor your links to meet specific requirements and ensures that they are ready for immediate use.
Subscription Links
The Subscription Links feature in our Chrome Extension allows you to create subscription-based links with ease. The process is similar to creating Manual Links, with a few key differences. Follow these steps to create a subscription link:
-
Open the Extension:
- Click on the extension icon in your browser toolbar to open the Chrome Extension interface.
-
Navigate to Subscription Links:
- Select the "Subscription Links" option from the extension menu to access the subscription link creation form.
-
Fill in the Required Fields:
- Complete all the necessary fields in the form to create your subscription link. These fields may include details such as the link name, description, amount, and any other relevant information required for the link. Note that the service and currency fields are not available, as the subscription is managed via Stripe.
-
Save & Auto-Publish:
- Once you have filled in all the fields, click on the "Save & Auto-Publish" button. This action will create the subscription link and immediately publish it via Stripe.
-
Retrieve Your Link:
- After clicking "Save & Auto-Publish," the extension will display the newly created subscription link on the screen, ready for you to use.
By following these steps, you can create subscription-based links directly from the Chrome Extension. This feature ensures that your subscription links are ready for immediate use and managed seamlessly through Stripe.